
Maybe you have a favourite garment that’s been with you since your university days. Maybe you’re on the way out the door for an upscale event or an important meeting when a button decides to dislodge from your suit. Maybe you’re just money conscious and want your wardrobe to last as long as possible.
There are a million reasons to learn how to care properly for your clothing. It can be tempting to simply retire a garment that seems worn beyond repair, or to pass the job off to a professional tailor, but there’s plenty you can do yourself with minimal special tools required. Your bank account will thank you.
Brush up on these basic clothing care essentials:
Read The Washing Instructions
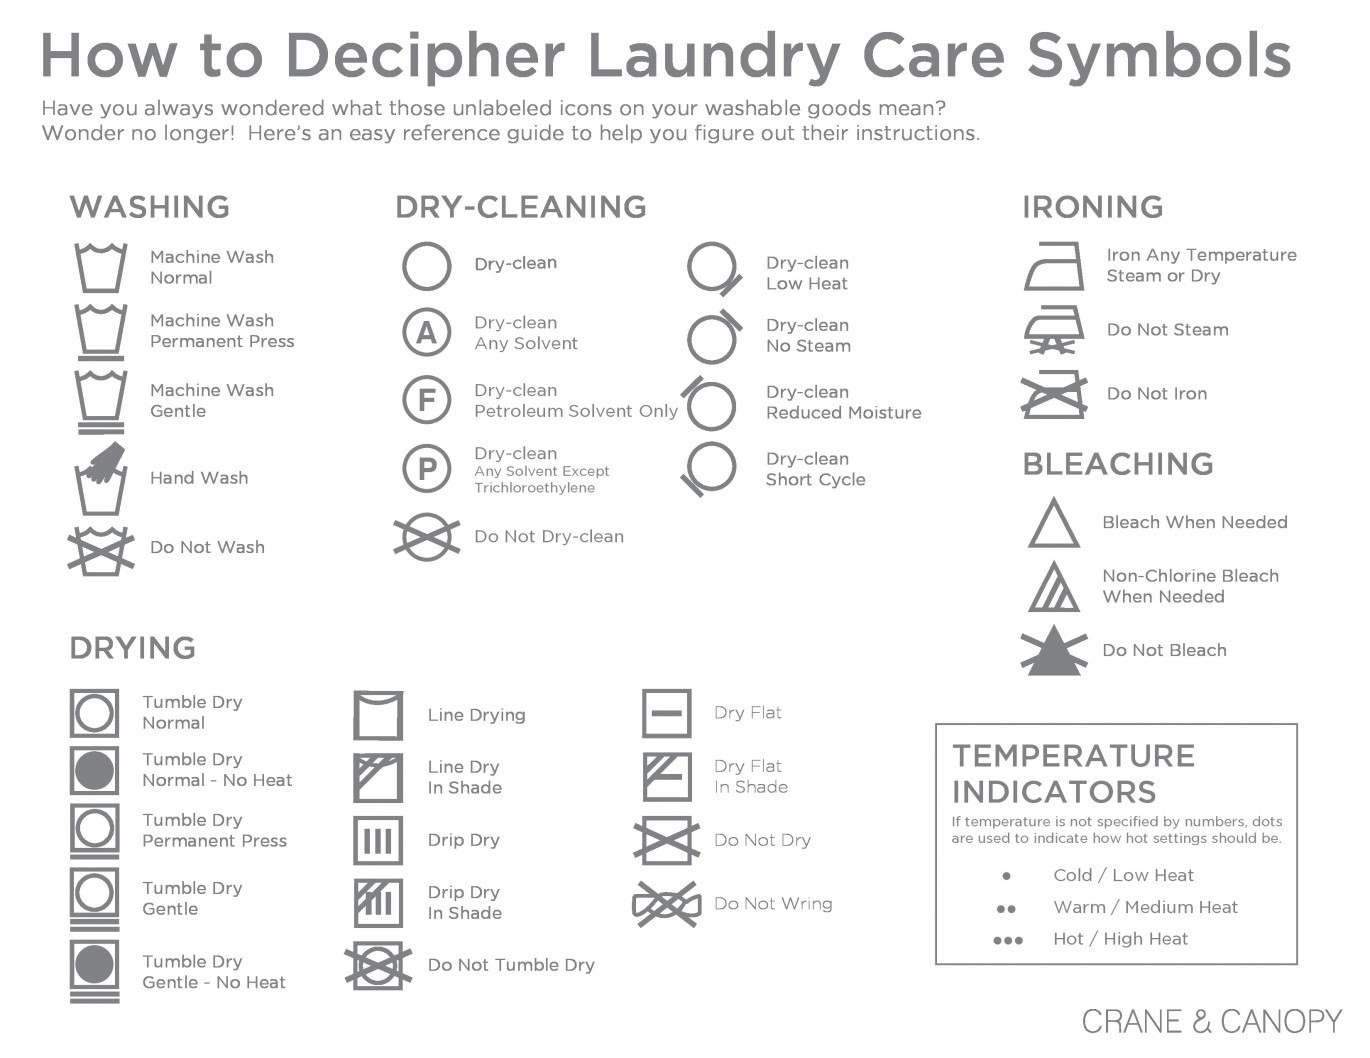
They’re there for a reason, gentlemen. If the label says to machine wash your garment in cold water with like colours, inside out, and never to tumble dry or apply an iron – listen to it.
Don’t think you can outsmart the label. Ideally, you should read the label prior to purchasing a garment. If you’re not up to the task of caring for it in the recommended manner, don’t buy it.
Sewing A Hem

Don’t tell your tailor this, but you can handle hemming at home. At a basic level, at least. There’s no substitute for professional work when you want a really outstanding job, but in a pinch you can adjust the length of a garment yourself. Start by ironing out any creases or bumps so that the hemline you create will be accurate.
You can also use the iron to measure the hemline to the width you’d like the new hem to be, if you don’t have pins or chalk available to mark it. There are lots of different stitches you can use, with varying degrees of difficulty, but always begin on the wrong side of the hem and knot the thread at the end.
Treating Stains
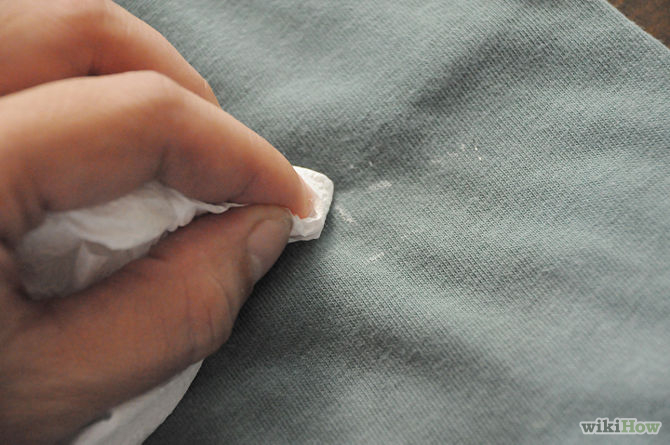
Stains should be treated immediately. The procedure for removal will depend on what caused the stain and what fabric you’re removing it from, but the rule of immediacy stays the same. Get on it ASAP for best results.
For an added degree of caution, test any stain removal method on a hidden seam or other inconspicuous spot before applying the treatment to the full area. Avoid direct heat, which typically speeds up most types of stains’ bonding, and avoid applying solvents with too much pressure or forceful scrubbing.
Sewing A Button
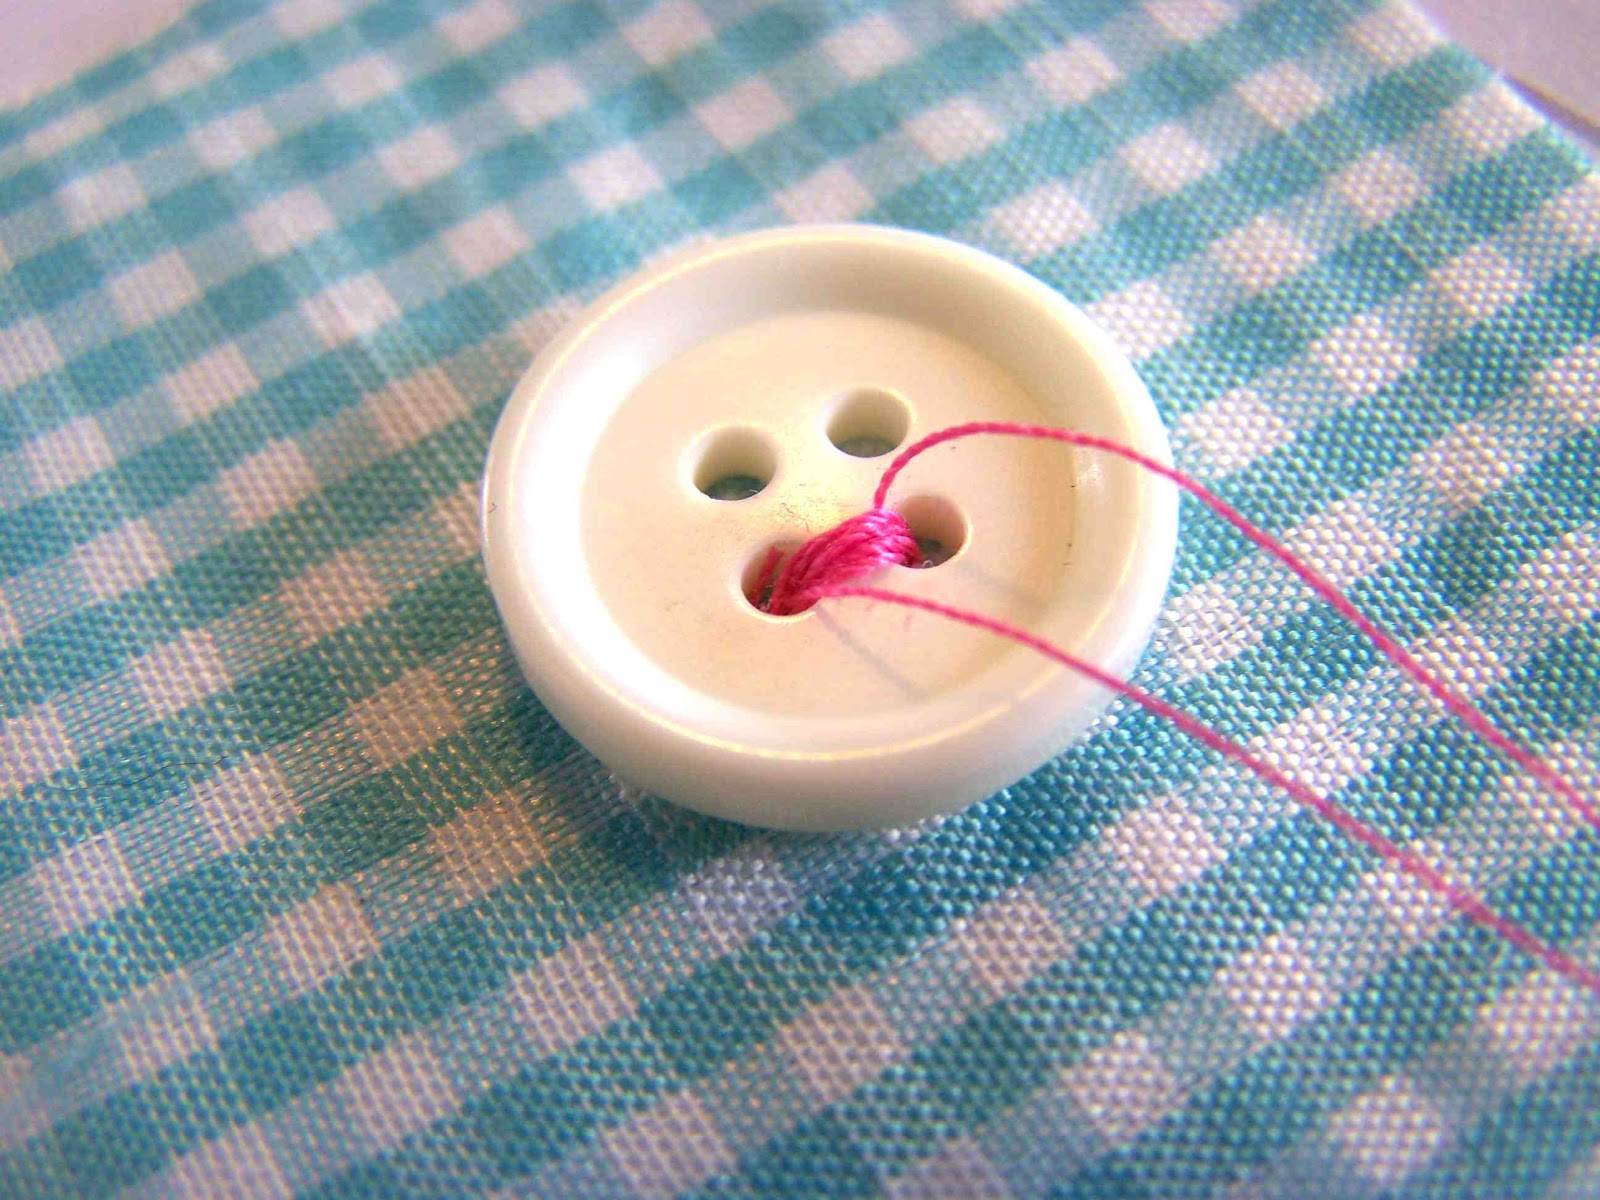
Many garments come with extra buttons, saving you the task of having to find a passable replacement. The only other tools you need are a needle, thread and a cutting device (your teeth will do in an emergency).
Start by threading the needle and knotting the end. Then, starting at the back side of the fabric, create a small X to anchor the button.
Place the button over the X and begin the attachment process. Keep a sewing kit and any extra buttons or thread that came with your clothing in one place for easy retrieval when needed.
Repairing Seams
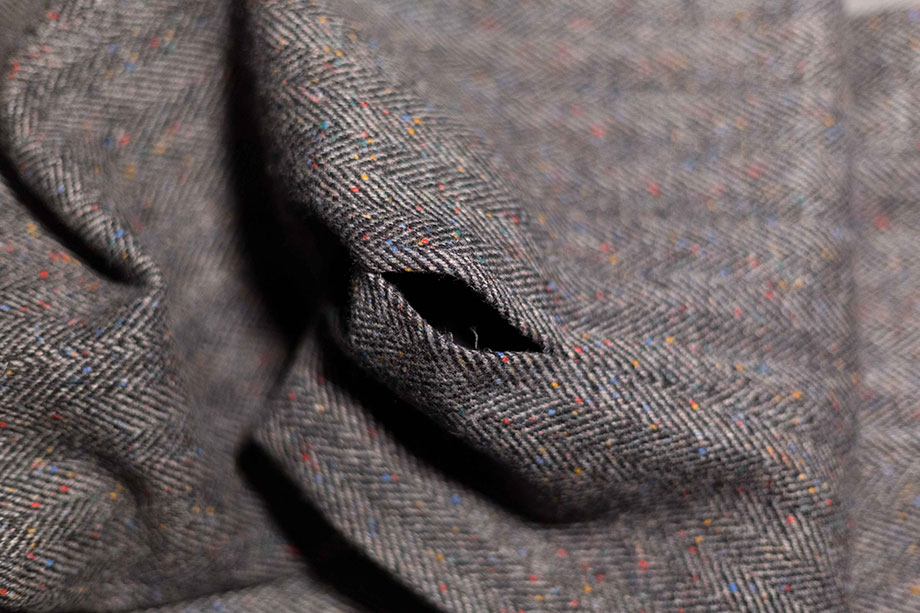
A small hole is no reason to give up on a garment. A seam that has torn or come undone can be sewn closed with little effort. Look at the tear and turn the clothing item inside out.
Use a basic running stitch to weave the thread across the tear and pull it closed. To secure it, sew several small stitches in the same place and tie two or three simple knots at the end of the stitches.
It’s a straightforward repair for even the most inexperienced, and won’t be visible when you’re finished. Handy video.
Patching A Hole

If a hole appears somewhere other than a seam, you may need to apply a patch. It isn’t the most aesthetically pleasing fix, but it’s functional. (Note: A patch can sometimes be placed on the inside like the above image.)
Look for matching material to make the patch blend in as much as possible, or choose a decorative patch that will become a feature rather than a flaw. Make sure the patch is slightly bigger than the hole you’re repairing and that the grain of the fabric matches (if relevant).
After the patch is sewn on, finish it off by ironing it in place. Easy iron-on patches are available, but you’re better off sticking with the sturdier sewn-on kind.
Stiff Or Broken Zippers
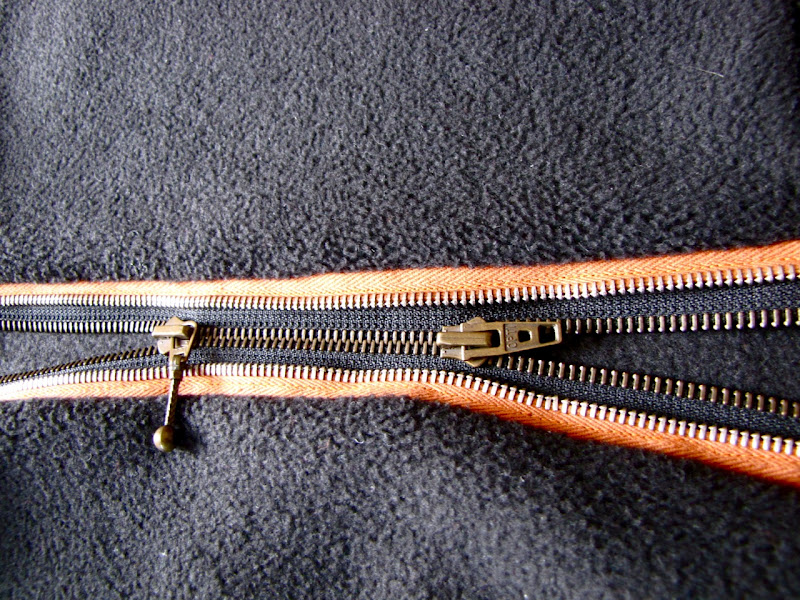
There are a few zipper-related repairs it wouldn’t hurt to have in your repertoire, but the most important is knowing how to loosen a stuck zipper. One solution is to grab a graphite pencil and rub the tip on the zipper’s teeth. If that doesn’t work, try Windex, bar soap or lip balm as a lubricant. Some have even reported success with crayons or candles. Begin with the zipper all the way up, then slowly apply the lubricant to the teeth, inching the zipper down a little more with each application. Continue until the zipper comes completely loose. Always spot-test the fabric first to make sure your chosen method won’t cause any permanent damage.
Removing Smells
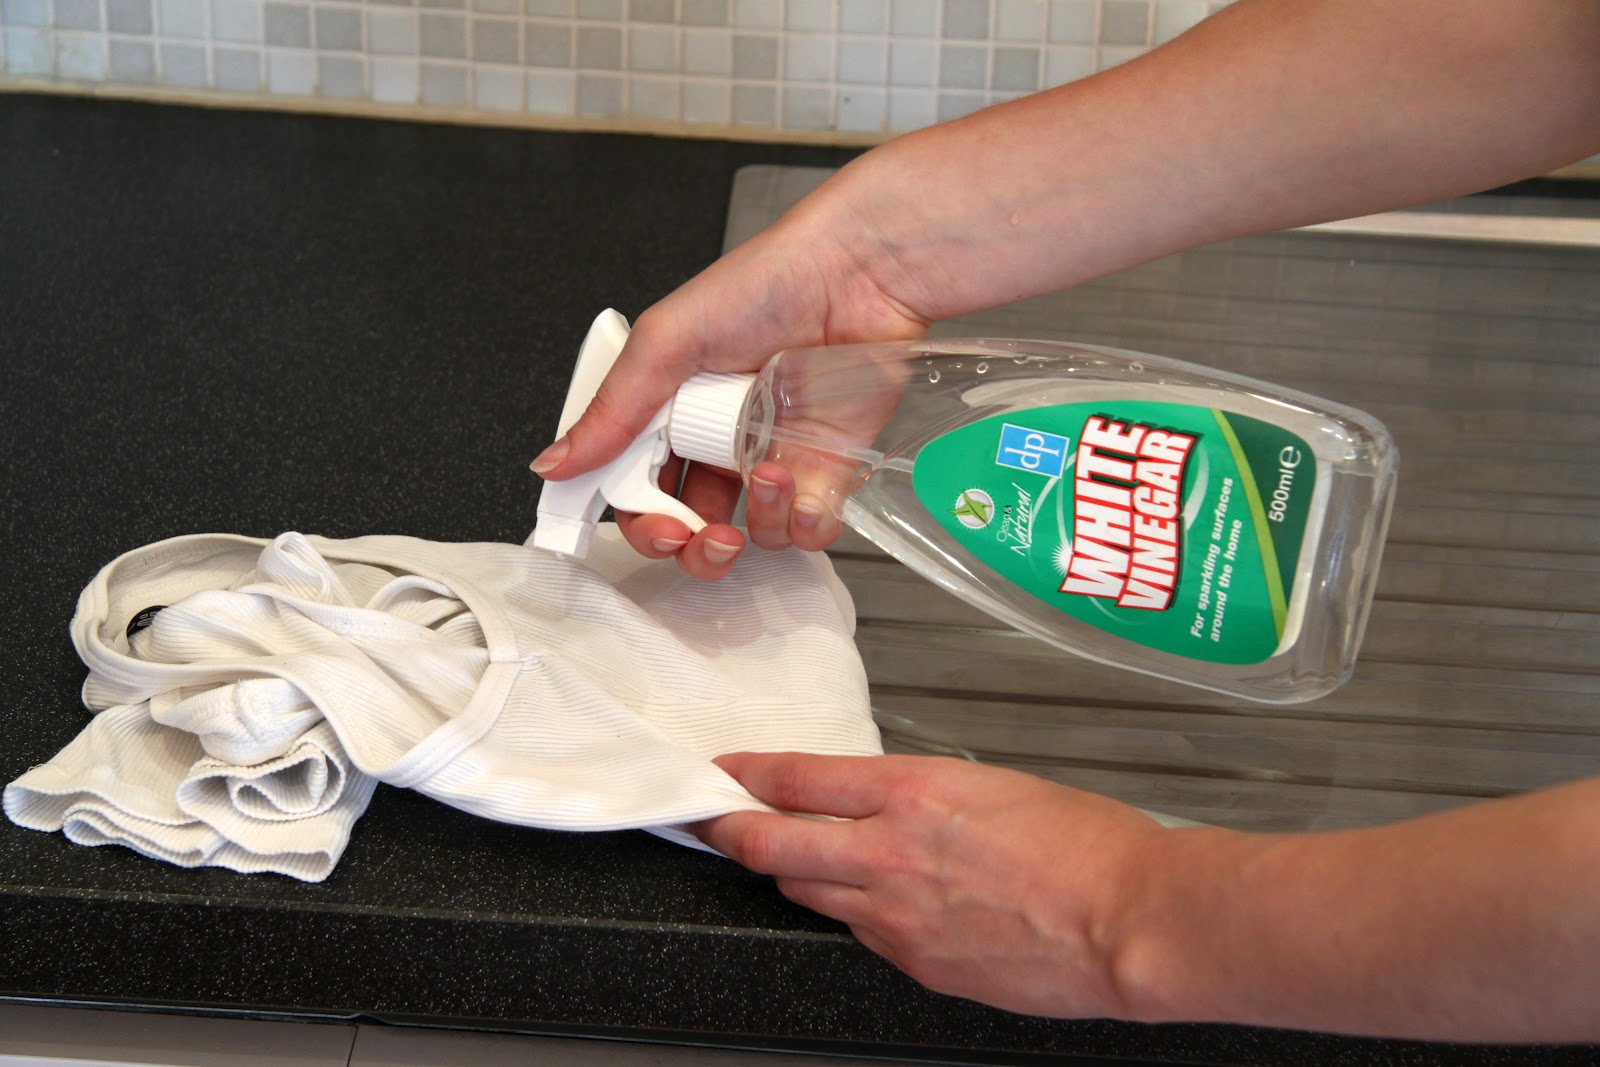
As with stains, the kind of treatment required for odours depends on the smell in question, but baking soda or vinegar is frequently a safe bet. Clingy smoke smells can be removed by soaking clothes in a baking soda/water or vinegar/water solution, as can sweat. For tough mechanical smells like oil, leave your clothing sealed in a bag for a day or two before washing. Baking soda or vinegar can also be applied directly to smelly laundry if you won’t have a chance to wash it right away.
No hay comentarios:
Publicar un comentario